
 Save
Save
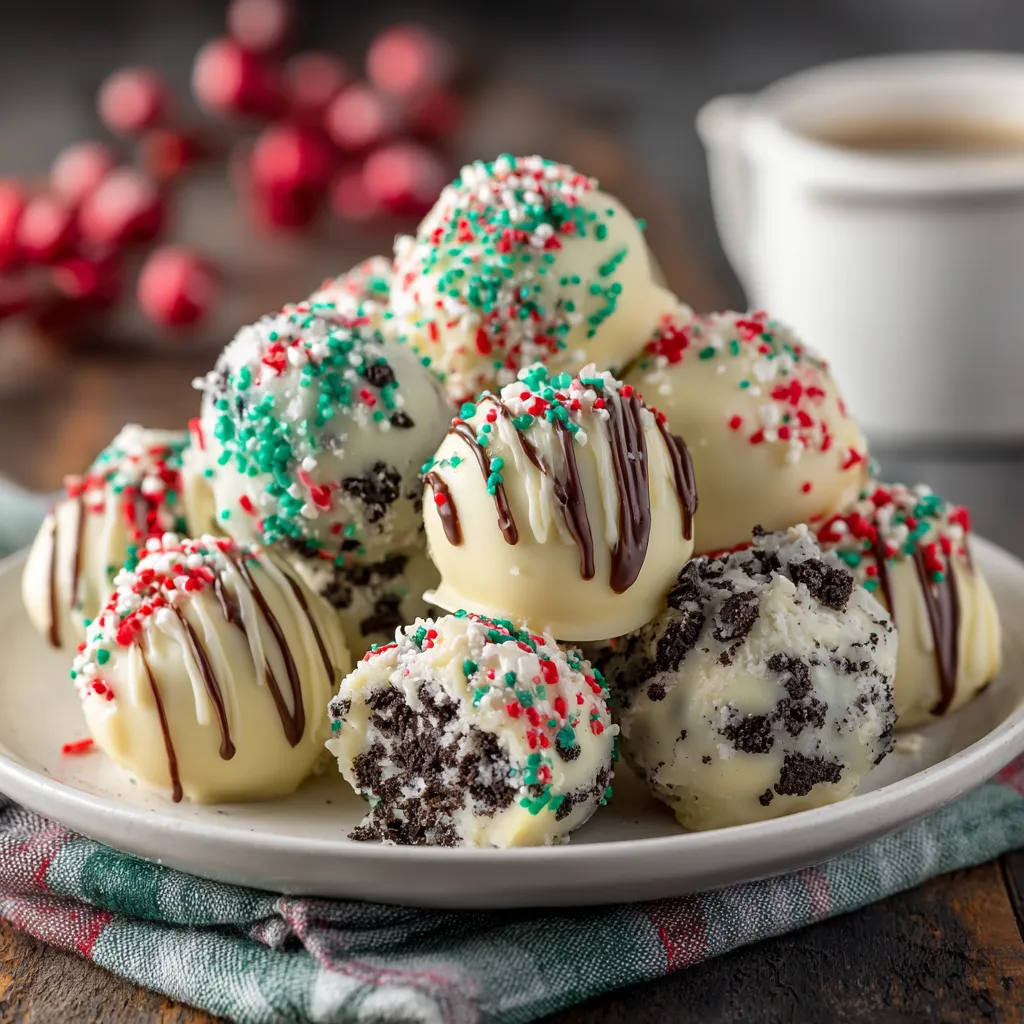
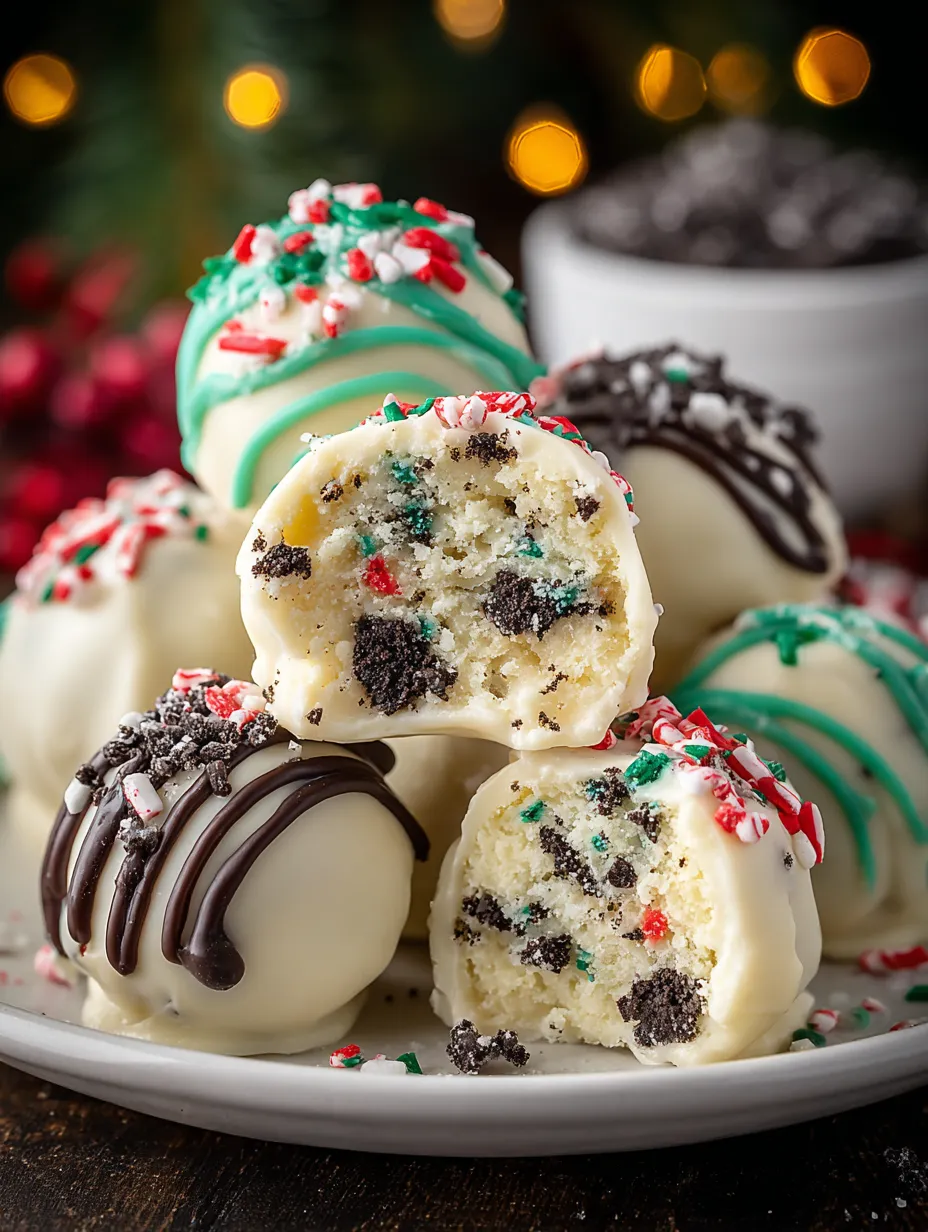
These Christmas Oreo Balls are a festive no-bake treat that captures all the creamy chocolate goodness you want during the holidays. With a smooth cream cheese and Oreo cookie center coated in melted chocolate and topped with seasonal sprinkles, these bite-sized delights are perfect for any cookie exchange or holiday party. They come together quickly without turning on your oven, making them a stress-free favorite.
When I made these the first time, the kids were instantly hooked and helped me decorate every single one. It quickly became a joyful family tradition each Christmas season.
Ingredients
- Oreo cookies: thirty-six pieces, the base of the recipe providing the iconic chocolate and cream flavor. Choose classic Oreos or any chocolate sandwich cookie you prefer
- Cream cheese: eight ounces softened, key for a rich, creamy filling that binds the cookie crumbs together smoothly. Make sure it is softened for easier mixing
- Optional: half teaspoon vanilla or peppermint extract, adds a festive twist depending on your mood
- Chocolate: twelve ounces white, milk, or dark, choose your favorite kind to coat the balls. Quality chocolate melts better and creates a nicer finish
- Holiday sprinkles: crushed candy canes or colored drizzle, these bring the festive look and a bit of crunch to the outside
Step-by-Step Instructions
- Crush the Cookies:
- Place the Oreo cookies in a food processor and pulse until they become fine crumbs resembling sand. If you don’t have a processor, place cookies in a sealed bag and crush them using a rolling pin for the same texture.
- Mix the Filling:
- Add the softened cream cheese to the Oreo crumbs. Blend or stir thoroughly until you get a thick, smooth dough that sticks together well enough to shape. If you want extra flavor, mix in vanilla or peppermint extract at this stage.
- Shape into Balls:
- Scoop out about a tablespoon-size portion of the dough and roll it gently between your palms to form smooth balls. Place each ball on a tray lined with parchment paper to prevent sticking.
- Chill:
- Refrigerate the balls for twenty to thirty minutes to firm them up. This step is important because chilled dough holds its shape better and makes dipping easier without melting.
- Melt the Chocolate:
- Using a microwave-safe bowl, melt the chocolate in short twenty to thirty second bursts, stirring between intervals until it is silky and smooth. Be careful not to overheat the chocolate, which can cause it to seize.
- Dip and Decorate:
- Use a fork or dipping tool to submerge each chilled ball in the melted chocolate. Allow the excess chocolate to drip off before placing it back on the parchment-lined tray. Immediately add your festive sprinkles or crushed candy canes while the coating is still wet to ensure they stick.
- Let Them Set:
- Allow the dipped Oreo balls to sit at room temperature until the chocolate hardens or place them back in the fridge for faster setting before serving.
 Save
Save
I love including peppermint extract for that extra seasonal pop. One Christmas, my niece helped me crush the Oreos, and we laughed watching the kitchen quickly fill with sweet chocolate aromas. It’s these simple moments that make this recipe extra special.
Storage Tips
Store the finished Oreo balls in an airtight container in the refrigerator. They keep well for up to one week and maintain their texture and flavor. If you want to store longer, freeze them on a tray first then transfer to a sealed bag to prevent clumping, and thaw in the fridge before serving.
Ingredient Substitutions
Swap the classic Oreos for gluten-free sandwich cookies if needed to accommodate dietary special needs. Cream cheese can be replaced with a dairy-free alternative for lactose intolerance, but soften it carefully for easy mixing. Chocolate coating can be white, milk, or dark depending on your taste preference or what you have on hand.
Serving Suggestions
Serve these Oreo balls as part of a holiday dessert platter alongside other cookies and candies. They pair beautifully with hot cocoa or coffee and can also be festive cupcake toppers if you get creative. Adding crushed candy canes on top gives a nice crunch and an extra holiday touch.
Cultural Context
The Oreo cookie has been a beloved American classic for nearly a century, and turning it into truffle-style treats is a fun modern twist that mixes nostalgia with festive creativity. These no-bake balls capture the joyful spirit of holiday baking without needing an oven, making them accessible year after year.
Pro Tips
Always use softened cream cheese so the filling blends smoothly without lumps. Chill the Oreo balls thoroughly before dipping to prevent melting or crumbling during coating. Add sprinkles right after dipping while the chocolate is still wet for the best adhesion.
Recipe FAQs
- → How do I get a smooth filling for the oreo balls?
Using softened cream cheese and mixing it thoroughly with finely crushed cookies ensures a smooth, pliable filling that's easy to shape into balls.
- → Can I use different chocolate types for coating?
Yes, white, milk, or dark chocolate can be melted for coating, allowing you to customize flavor and appearance to your preference.
- → What is the best way to crush the cookies?
A food processor quickly produces fine crumbs, but alternatively, placing cookies in a sealed bag and crushing with a rolling pin works well.
- → How long should I chill the balls before dipping?
Refrigerate the shaped balls for 20–30 minutes to firm up, which helps them hold shape during the chocolate coating process.
- → How can I ensure the sprinkles stick properly?
Apply sprinkles immediately after dipping in melted chocolate before the coating sets to help them adhere firmly.
- → What if the melted chocolate thickens?
Reheat gently in short intervals while stirring to restore a smooth consistency suitable for dipping.