
 Save
Save
This No Bake Red Velvet Cheesecake is a showstopper dessert made for the holidays and busy cooks who still want to impress. Every layer is creamy and chocolatey with pops of color and the whole thing comes together without ever turning on the oven. You can make it ahead for Christmas parties or serve it as a stunning centerpiece after a family meal and no one will guess how easy it was.
I started making this for our December birthdays and now my siblings always ask for the Oreo crust and that swirl of red velvet at every holiday meal because it just feels like pure celebration.
Ingredients
- Oreo cookies: make a chocolatey and crunchy crust that balances the creamy filling so buy fresh ones not stale for best results
- Butter: helps the crust hold together make sure it is fully melted
- Cream cheese: is the base for any cheesecake go for full-fat and always let it soften at room temperature for smoothest texture
- White sugar: sweetens the filling use classic granulated since it dissolves easily
- Heavy whipping cream: provides that mousse-like lift so use very cold cream and whip until stiff peaks
- Vanilla extract: rounds out all the flavors pure vanilla gives a fragrant depth
- Cocoa powder: brings in real red velvet richness pick unsweetened and a good quality brand
- Red food coloring: creates that signature red never skip gel food color for the most vibrant result
- Christmas sprinkles: mixed into the white batter add holiday cheer pick bright colors and avoid waxy or faded options
- Whipped cream: is your finishing touch stabilize with a bit of powdered sugar if you want it to hold up longer
- Mini Oreos and extra Christmas sprinkles: add a playful and festive garnish
Step-by-Step Instructions
- Make the Crust:
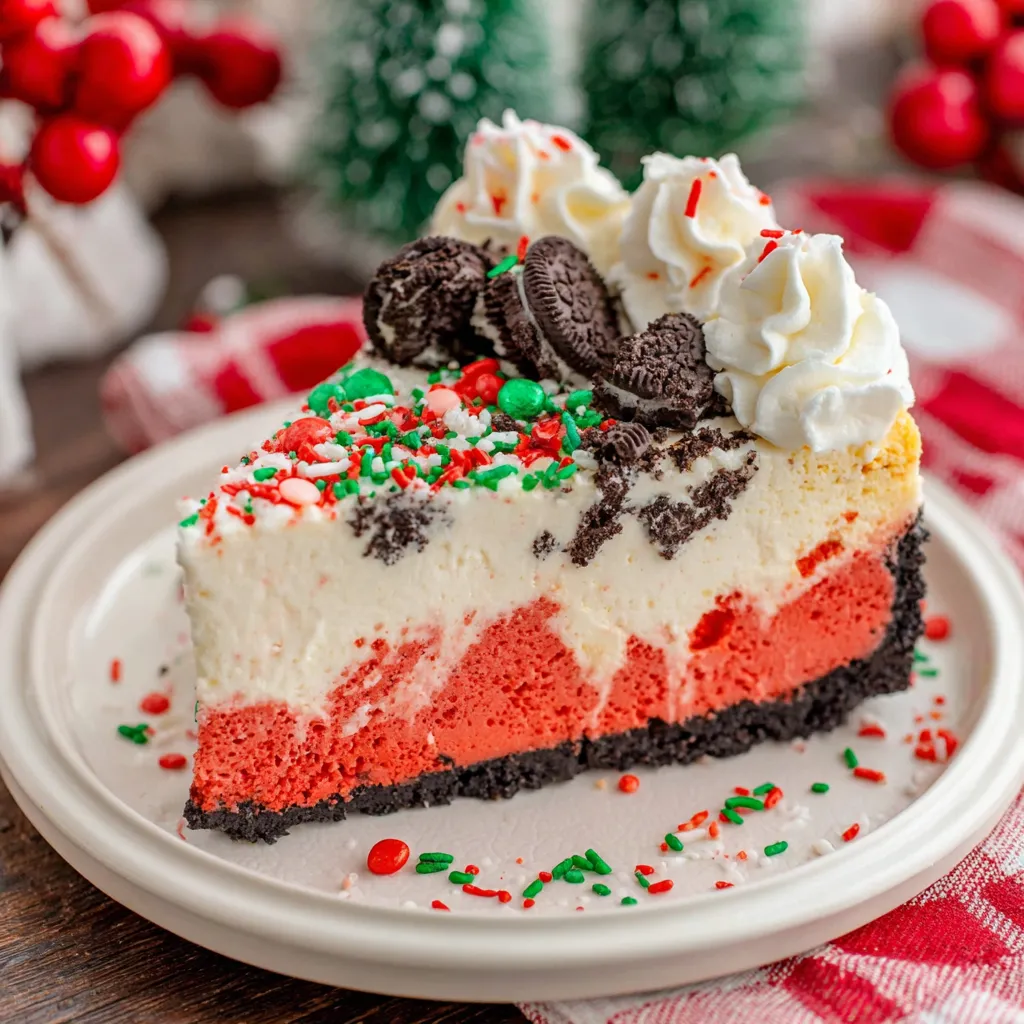
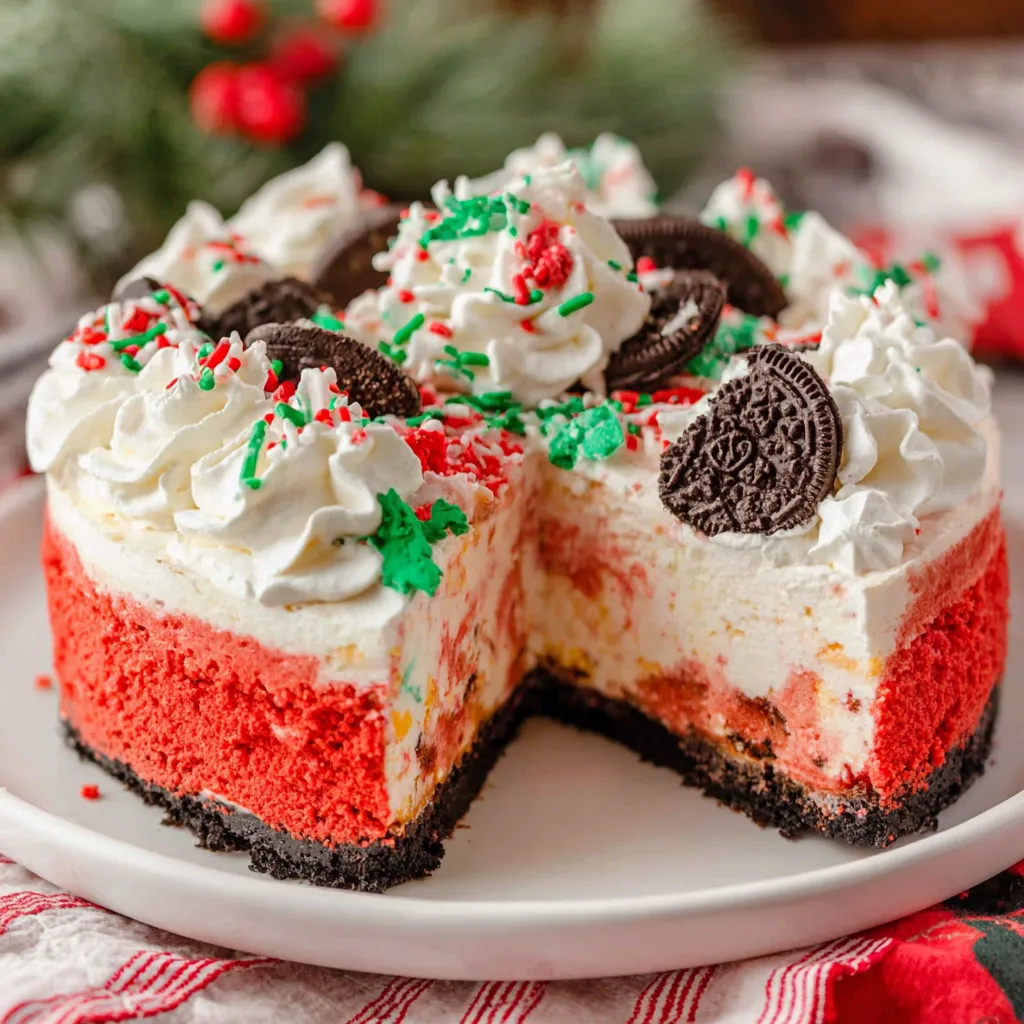
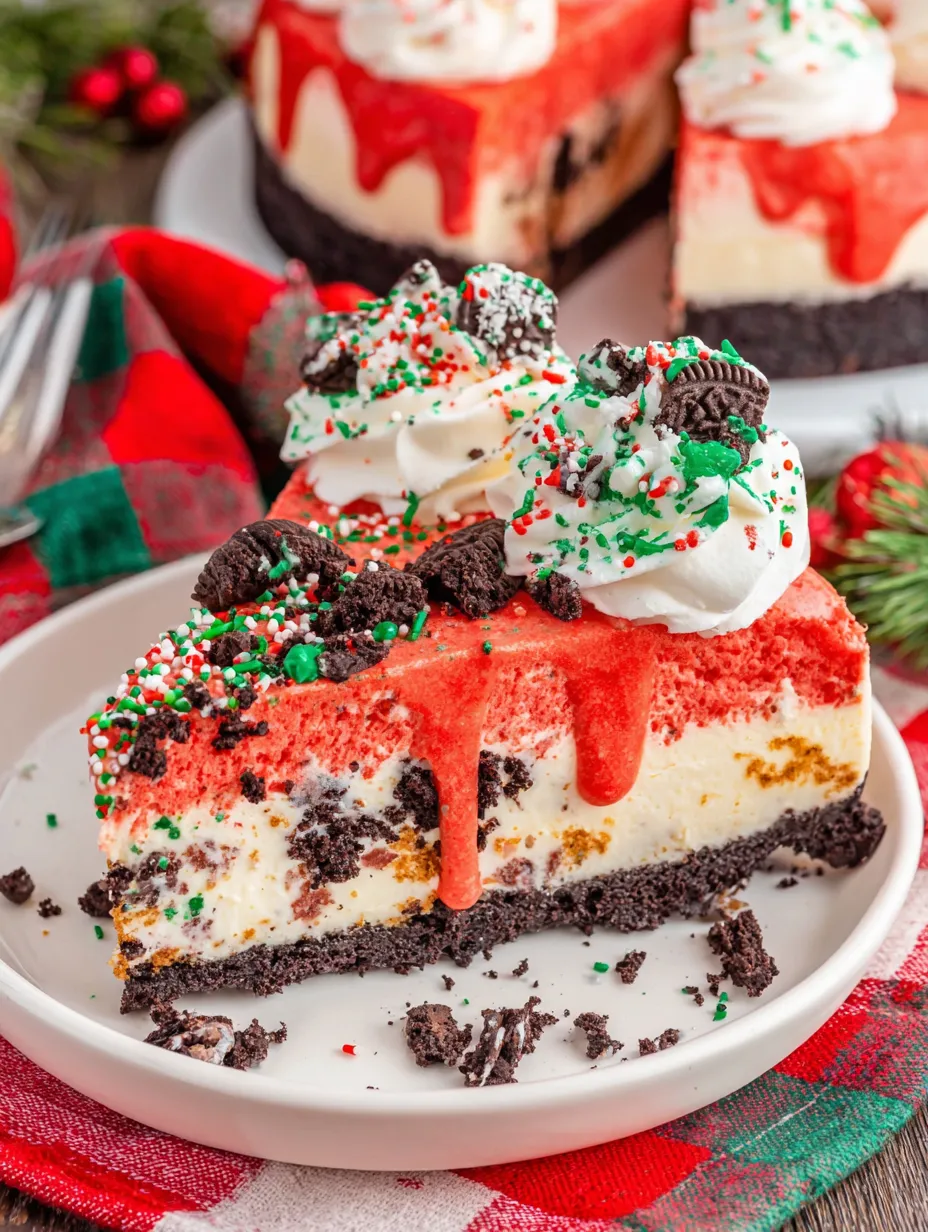
- Crush Oreo cookies with the filling inside in a food processor until very fine then mix completely with melted butter until every crumb looks shiny and press firmly into the base of your springform pan until it is even and compact. Chill in the fridge to set while you work on the filling
- Whip the Cream:
- Chill your mixing bowl and beaters in the fridge for at least 10 minutes. Pour in the heavy whipping cream and beat at medium-high speed until you see stiff peaks that stand up on their own when you lift the whisk. Set aside but do not overwhip
- Mix the Cheesecake Base:
- In a fresh large bowl beat softened cream cheese with sugar until there is no graininess and it looks fluffy and light. Add vanilla extract and beat again till completely smooth
- Fold in the Whipped Cream:
- Gently fold whipped cream into the cream cheese base using slow, soft strokes so you keep as much air as possible. Stop when just combined and your mixture looks cloudlike
- Create the Colors:
- Divide the cheesecake batter evenly into two. In one half mix in cocoa powder and drops of red food coloring until you reach your ideal red velvet color. In the other half fold in Christmas sprinkles gently so the colors do not bleed
- Assemble the Cheesecake:
- Set your chilled crust on the counter. Using a large spoon alternate between dollops of red velvet and sprinkle batter all over the crust. Swirl the top gently with a butter knife or skewer to create a marbled pattern but do not overmix
- Chill:
- Cover the pan with plastic wrap making sure it does not touch the surface and refrigerate at least four hours or overnight for best texture
- Decorate and Serve:
- Right before serving pipe or dollop whipped cream around the edges. Arrange mini Oreos and a heavy handful of extra Christmas sprinkles on top for sparkle. Slice with a hot dry knife for clean edges and watch it disappear
 Save
Save
My favorite part is always folding the sprinkles into the white batter since my daughter loves guessing how many colors she will find in each slice. Once my nephew tried to swipe all the mini Oreos from the top during dinner so now I always add extra just for the kids’ delight.
Storage Tips
Leftovers keep best tightly covered in the fridge for up to four days. The colors stay vibrant and the texture will not dry out. If you want to freeze it wrap slices in plastic and then foil and thaw overnight in the fridge before serving. Always decorate with whipped cream and sprinkles just before serving so toppings stay crisp.
Ingredient Substitutions
Gluten free chocolate sandwich cookies work for a completely gluten free version. You can swap mascarpone for some of the cream cheese if you want an even silkier filling. For a different color theme change out the red food coloring and go for blue and silver sprinkles for a New Year variation.
 Save
Save
Serving Suggestions
This cheesecake pairs perfectly with hot coffee or mulled wine on a cold night. Slice it small for a dessert buffet or larger wedges for a sit-down dinner. For extra fun let everyone decorate their own slice with extra whipped cream and sprinkles tableside.
Cultural and Holiday Inspiration
Red velvet cake is a classic for Southern holiday tables and this no bake version channels that spirit while giving everyone a little break from the usual fruitcake or cookies. No bake cheesecakes became popular in the United States in the fifties and sixties as a make-ahead treat for busy households and they fit right in with today’s need for quick festive showstoppers.
Recipe FAQs
- → How do I make the Oreo crust for this cheesecake?
Pulse whole Oreo cookies in a food processor until fine crumbs form. Mix with melted butter until evenly coated, then press firmly into the pan's base before chilling.
- → What gives the cheesecake its red velvet color?
Red food coloring combined with cocoa powder is mixed into half of the cheesecake filling, creating the classic red velvet shade and flavor.
- → How should I whip the cream for the filling?
Beat the heavy whipping cream in a chilled bowl until stiff peaks form, ensuring a light and mousse-like texture when folded into the cream cheese mixture.
- → Can I prepare this dessert ahead of time?
Yes, it’s designed for make-ahead convenience. Chill for at least 4 hours or overnight to set the cheesecake fully before serving.
- → What decorations enhance the cheesecake's appearance?
Top with whipped cream, mini Oreos, and extra festive sprinkles to add color, texture, and a festive holiday touch.
- → How is the marbled effect achieved in the filling?
Alternate spoonfuls of the red velvet and sprinkle-filled batters in the crust, then gently swirl them together using a knife or skewer.