
 Save
Save
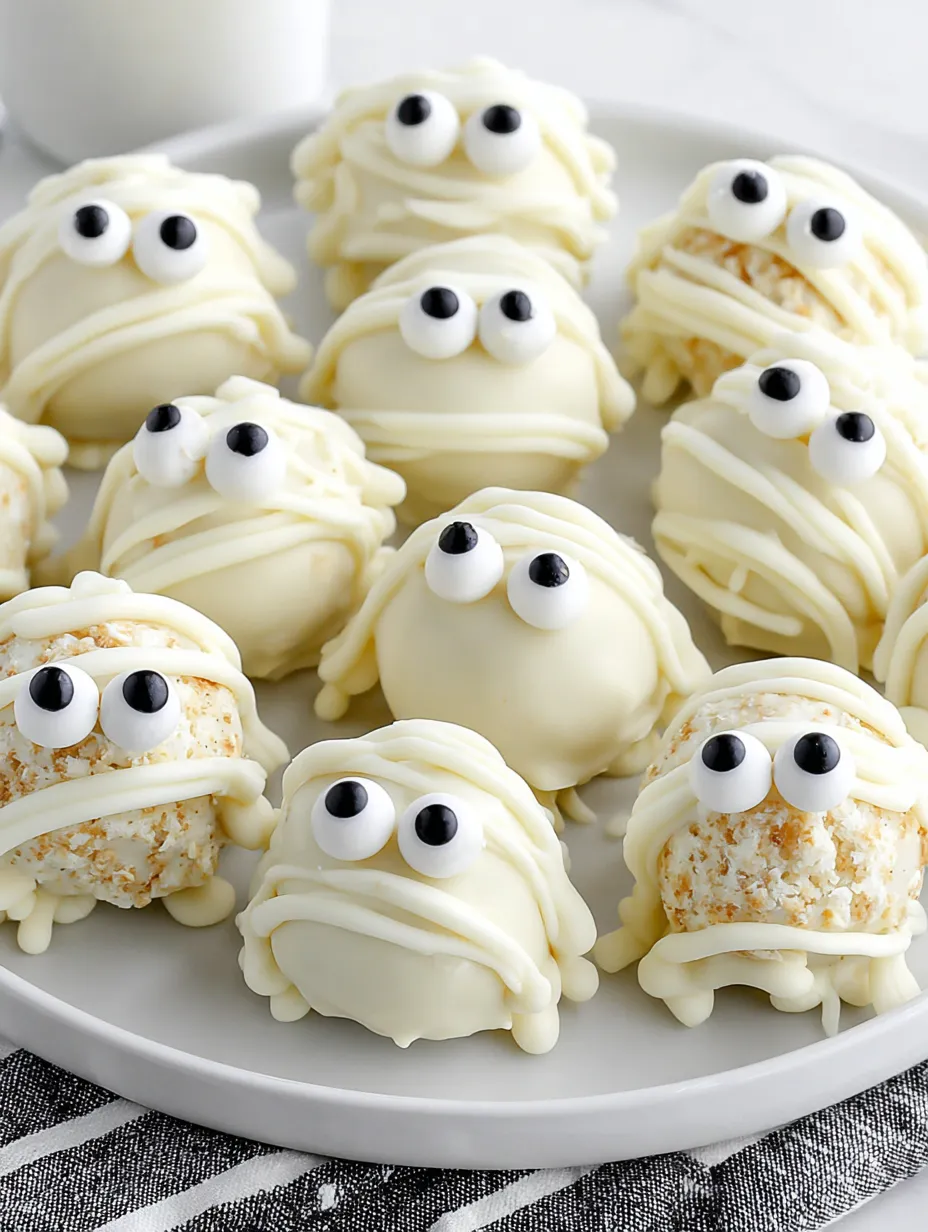
Mummy Oreo Balls are my go-to Halloween dessert every year and always a hit with kids and adults. Creamy sweet centers get wrapped in a shell of candy coating and topped with candy eyes for the cutest spooky treat. You do not even need an oven so it is the kind of hands-on project little helpers love.
I still remember my niece giggling when she stuck the candy eyes on these for the first time. Now we have a tradition where we make them together every October.
Ingredients
- Golden Oreos They give a light color that makes the mummy coating pop Choose a fresh package so the cookies are crisp not stale
- Cream cheese Brings rich tang and holds the mixture together Let it fully soften at room temperature to blend smoothly
- White chocolate candy melts Smooth results and easy dipping Use a good quality brand for best shell texture
- Candy eyes Essential for that signature look Be sure you grab food-safe candy eyes at your grocery or online
Step-by-Step Instructions
- Make the Oreo Base:
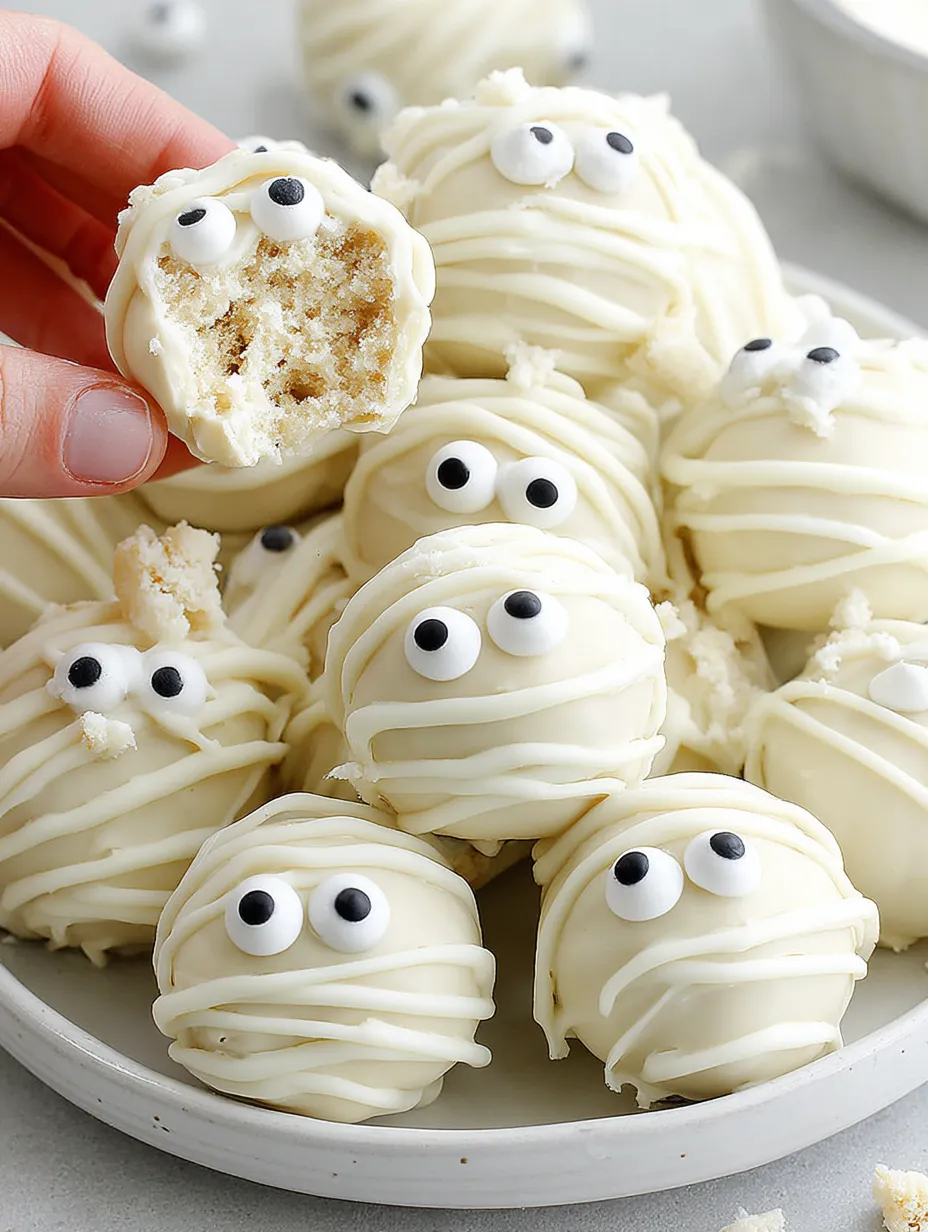
- Pulse the golden Oreos to fine crumbs in a food processor. Add softened cream cheese and keep processing until you have a smooth even mixture. Gather little balls about one inch each. Put these on a baking sheet and freeze for thirty minutes until firm to touch. Getting the freeze time right helps the coating stick smoothly.
- Melt the Candy Coating:
- In a clean microwave-safe bowl heat the white chocolate candy melts following the package directions. Stir every 30 seconds so you do not overheat and scorch the chocolate. The candy should be fluid without lumps for the best dipping.
- Dip the Balls:
- Place one chilled ball on a fork and lower it into the melted coating. Spoon extra over the top to cover completely. Tap the fork gently on the bowl’s edge so excess coating drips off. Slide onto parchment paper while still wet. Repeat with the others. Drizzle more melted coating back and forth to make mummy bandage lines.
- Decorate With Eyes:
- While the top drizzle is still tacky press two candy eyes onto each ball. This is the step where kids can help and add their own silly touches. Chill the finished balls in the fridge about twenty minutes until the candy sets and hardens.
 Save
Save
My favorite part is seeing how expressive each little mummy looks when the eyes go on It always sparks laughter at our table and makes dessert extra fun
Storage Tips
Store mummy oreo balls in an airtight container in your refrigerator for up to five days. If you are stacking them layer sheets of parchment paper in between to prevent sticking. Freezing is possible for longer storage but the coating may crack slightly as it thaws.
Ingredient Substitutions
You can swap classic Oreos for the golden version but the darker filling may peek through the white shell. Use any style of candy melts or try tinted melts for colorful mummies just follow the same dipping and decorating methods. If you cannot find candy eyes small dots of black icing or mini chocolate chips work in a pinch.
Serving Suggestions
Pile mummy oreo balls on a platter with other Halloween sweets for a party dessert table. They travel well for class parties or work potlucks. Pair with a glass of cold milk or use them to top spooky cupcakes for a festive touch.
 Save
Save
Cultural Context
Desserts like these are an American October tradition where playful shapes turn classic recipes into Halloween magic. Since they are easy no bake and require minimal cleanup parents and teachers alike favor them for school and home celebrations.
Recipe FAQs
- → What kind of Oreos work best?
Golden Oreos are ideal because their light color shows nicely under the white chocolate coating, creating a clean appearance.
- → How do I soften the cream cheese properly?
Let the cream cheese sit at room temperature until smooth and lump-free, ensuring a creamy center for the balls.
- → Can I use regular white chocolate chips?
Regular white chocolate chips can be used, but adding coconut oil helps achieve a smoother, harder coating that won't soften at room temperature.
- → Where can I find the candy eyes?
Candy eyes are available at many grocery stores near sprinkles or online retailers, adding a fun decorative touch.
- → What is the best way to dip the balls in chocolate?
Place the ball on fork tines without piercing it, dip into melted chocolate, tap off excess, then decorate quickly before the coating hardens.