
 Save
Save
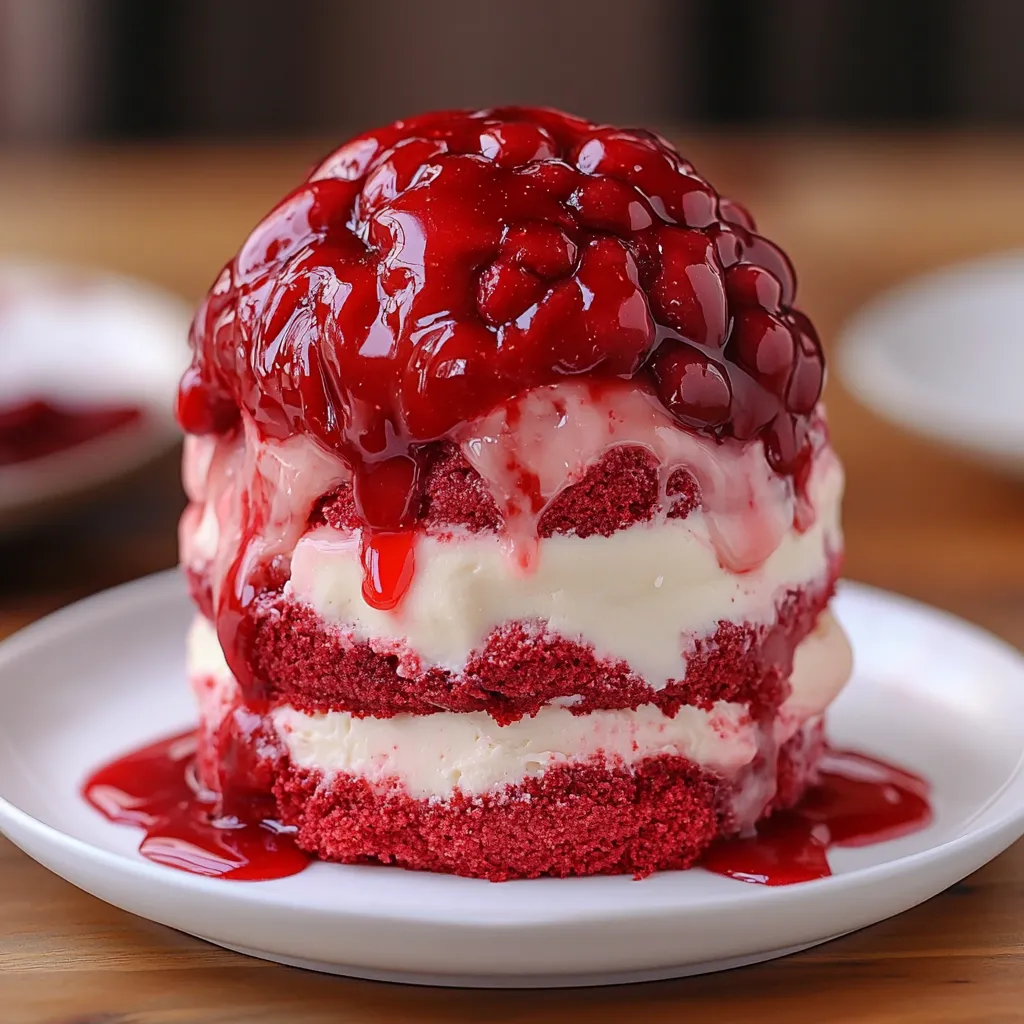
If you want a dessert that steals the spotlight at your next Halloween bash or themed birthday, this brain cake lets you create something unforgettable without needing bakery-level skills. It looks impressively spooky with lifelike folds and a glossy edible blood topping, but underneath it all is a moist and tender red velvet cake with tangy cream cheese frosting. Once you break down the steps, it is a fun project that always gets a big reaction from guests.
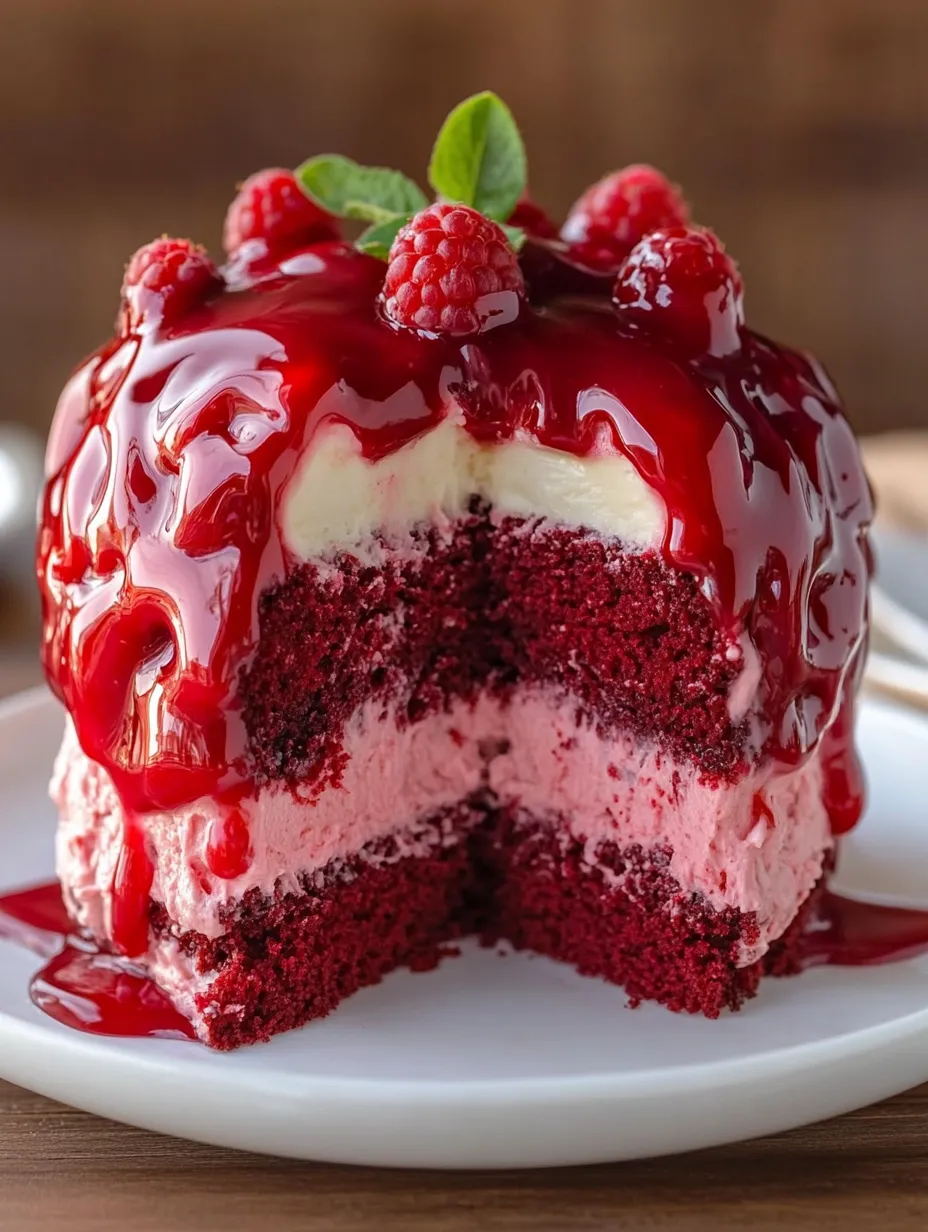
I first tackled this cake for my nephew’s Halloween birthday and the look on everyone’s face when we sliced into the bright red center is something I will not forget. Now it is my go-to for spooky requests and Halloween potlucks.
Ingredients
- Cake flour: gives your cake a soft and fine crumb look for a well-known brand like Softasilk or King Arthur for best results
- Unsweetened cocoa powder: brings subtle richness and helps set off the red color choose natural unsweetened and sift out any lumps
- Baking soda and fine salt: boost the cake’s rise and flavor use fresh baking soda for maximum lift
- Unsalted butter at room temperature: provides flavor and structure
- Granulated sugar: creates a tender crumb and balances the mild cocoa notes use pure cane sugar if possible
- Large eggs at room temperature: help bind the batter and add moisture fresh eggs work best
- Buttermilk: gives the cake a signature tang and keeps it fluffy always shake the container before measuring
- Vegetable or canola oil: helps ensure tenderness and moisture in every bite
- Vanilla extract or bean paste: rounds out the flavor aim for pure vanilla for best aroma
- White vinegar: interacts with baking soda and buttermilk to intensify both color and texture do not skip it
- Red gel food coloring: is the easiest way to get a deep red hue without thinning the batter
- For the frosting
- Unsalted butter and full-fat cream cheese: for silky richness and tang use both at room temperature
- Vanilla extract or bean paste and fine salt: balance the sweetness and flavor
- Powdered sugar: is essential for body and sweetness sift if lumpy
- Heavy cream: gives the frosting a smooth pipeable consistency only add a little at a time
- A touch of red gel or liquid coloring: for the signature pale pink brain look
- For edible blood topping
- Seedless raspberry or strawberry jam: makes the base for a glossy fake blood pick the deepest red jam you can find
- Water: thins out the jam for brushable consistency filtered water works best
- Optional red food coloring: for extra drama
Step-by-Step Instructions
- Prepare and Preheat:
- Get started by preheating your oven to 350 degrees Fahrenheit and lining three 8 inch cake pans with parchment circles plus a light coating of nonstick spray
- Mix the Dry Ingredients:
- In one medium bowl sift together the cake flour cocoa powder baking soda and salt This guarantees a smooth lump free batter and even rising
- Cream the Butter and Sugar:
- Use a stand or hand mixer to beat the butter and sugar until pale and fluffy This usually takes three to five minutes and will aerate the cake base
- Incorporate Eggs and Wet Ingredients:
- Beat in the eggs one at a time at medium speed making sure each is fully blended Add the buttermilk oil vanilla vinegar and red gel coloring Mix on low to avoid splattering and blend until the mixture is mostly smooth It may look slightly separated but will come together next
- Combine Wet and Dry:
- Add the dry ingredients in two batches folding gently with a spatula until just combined Do not overmix or the cake will be dense
- Bake the Cake:
- Divide the batter evenly among prepared pans Use a small kitchen scale or measuring cup for accuracy Bake for about twenty four to twenty eight minutes Test with a toothpick which should come out with some moist crumbs
- Cool the Layers:
- Let cakes cool in pans for ten minutes then turn out onto a wire rack to cool completely This prevents sticking and overbaking
- Chill and Shape the Brain:
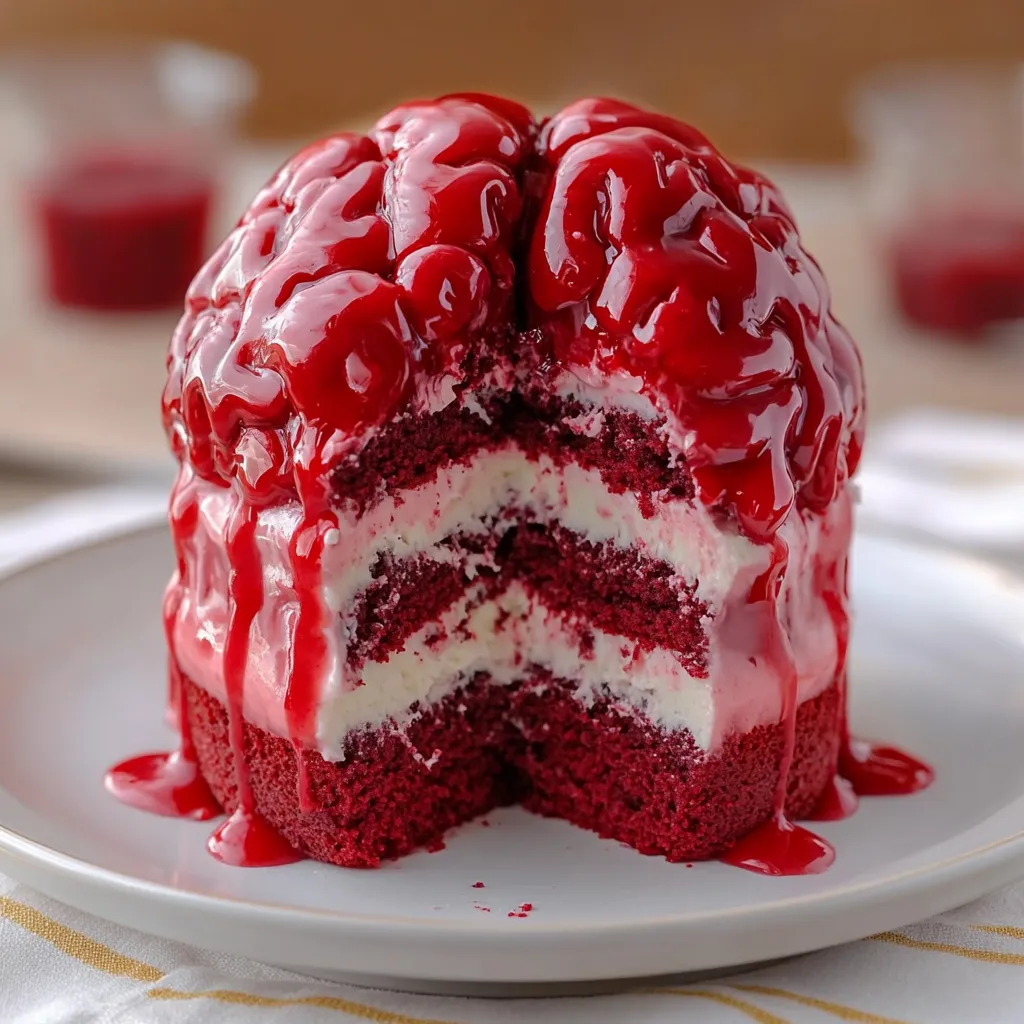
- Once cooled wrap the layers and chill for at least twenty minutes in the freezer This makes carving much easier Stack and trim the sides to create an oval and gently round the top to mimic a brain Save any trimmings for cake pops
- Make the Buttercream:
- Beat butter and cream cheese until smooth and fully blended Add vanilla salt and then gradually sift in powdered sugar Finish with heavy cream a spoonful at a time until the frosting is thick but easily piped Tint pale pink with a small amount of red coloring
- Decorate and Assemble:
- Stack the shaped cake layers with a thin swipe of pink frosting between each Coat the whole cake with a smooth crumb coat Chill briefly Pipe thick squiggly lines in close folds all over the cake to resemble brain gyri
- Prepare the Edible Blood:
- Whisk together jam and water until thin and glossy If needed blend in extra red coloring for a vivid look
- Finish with Blood Effect:
- Brush or spoon the fake blood over the piped brain folds Let it drip into crevices and around the base for the most realistic effect Chill until set and be sure to serve at room temperature for peak texture
 Save
Save
My favorite part is piping the brain folds with squiggly frosting It is messy and fun and no two cakes ever look exactly the same My daughter likes to “taste test” the fake blood every time we make this together
Storage Tips
To keep the cake moist store leftovers in an airtight container in the fridge for up to one week If you need to make it ahead tightly wrapped unfrosted layers freeze very well for up to a month The finished cake with frosting and edible blood also freezes beautifully just thaw overnight in the fridge before serving
Ingredient Substitutions
You can swap out the buttermilk for a homemade substitute by mixing one tablespoon of lemon juice or white vinegar into a cup of milk for every cup needed For a vegan cake use your favorite egg replacer plant based butter and dairy free cream cheese The edible blood works with any deep red jam and vegan versions of frosting pipe just as well
Serving Suggestions
Serve slices on a black plate with a drizzle of extra edible blood for true Halloween spirit This brain cake is a showstopper for mystery dinner nights or scary movie marathons and is always a kid favorite Customize the fake blood with a splash of cherry liqueur for a grown up twist
 Save
Save
Cultural and Historical Context
Red velvet cake originally comes from early twentieth century American baking and has always been synonymous with celebration Pairing it with a Halloween brain theme is a modern twist that honors its theatrical flair Red velvet was once prized for its deep red color created by the reaction of cocoa and acid now we just punch it up with food coloring
Recipe FAQs
- → What gives the cake its deep red color?
The vibrant red hue comes from red gel food coloring, which provides a rich tone without compromising batter texture or moisture.
- → How do I achieve a moist texture in the cake layers?
Using a combination of butter and oil with buttermilk ensures tenderness and moisture, while gentle mixing preserves crumb softness.
- → Why chill the cake layers before carving?
Chilling firms up the layers, making carving shapes easier and reducing crumbs for cleaner, precise cuts.
- → How is the glossy 'blood' effect created?
A glaze made from seedless raspberry jam thinned with water, sometimes tinted further, is brushed over the frosting to produce a shiny, dripping look.
- → Can the frosting color be adjusted?
Yes, adding small amounts of red gel or liquid coloring to the cream cheese buttercream gives a subtle pink tint that complements the cake’s hue.
- → What types of flour work best for carving cakes?
Cake flour is ideal due to its fine texture and lower protein content, resulting in a soft crumb that holds shape well.