
 Save
Save
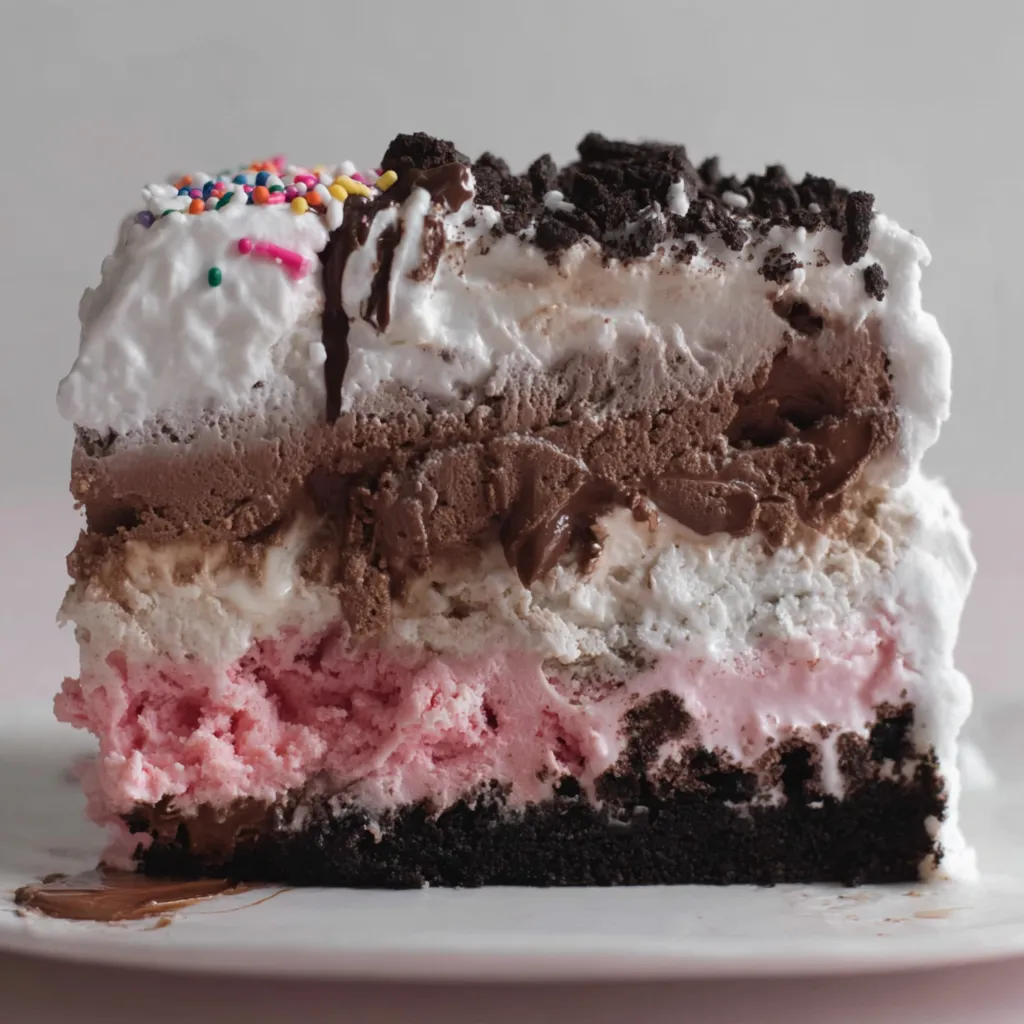
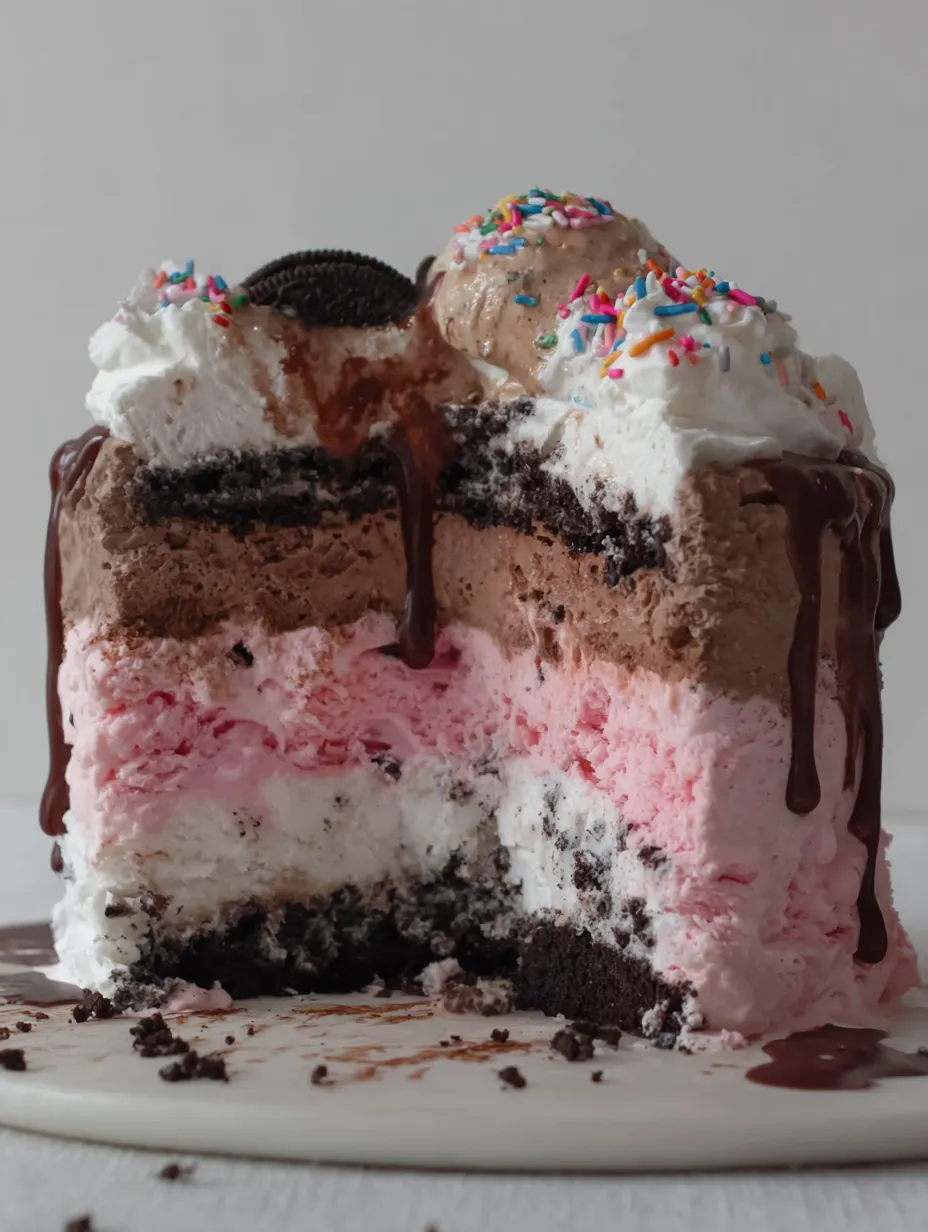
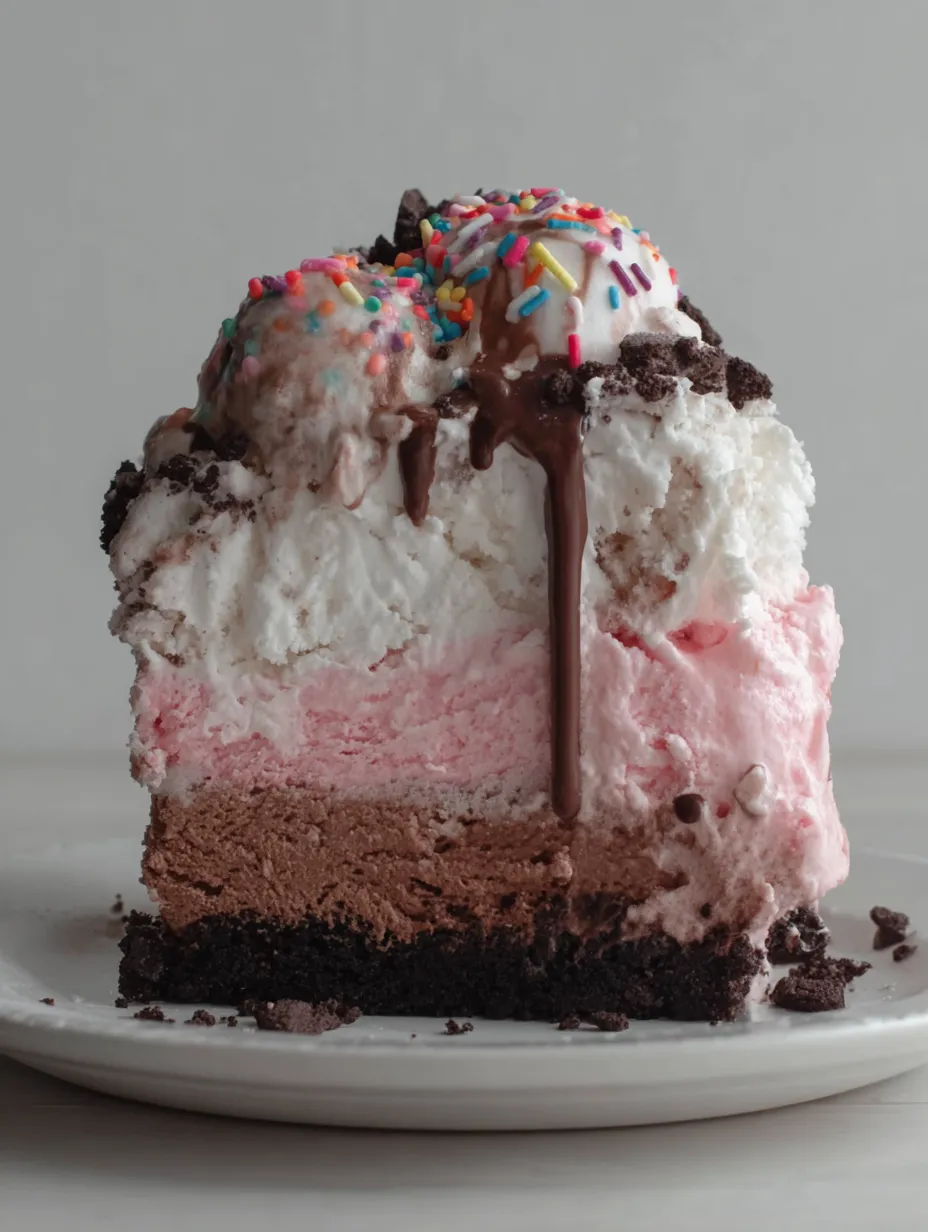
This show-stopping ice cream cake layers chocolate and strawberry ice cream with a crisp Oreo crust, gooey fudge, and a billow of homemade whipped cream. Every slice feels like a festive celebration, and you do not even need to turn on your oven. It is the perfect fix for birthdays, potlucks, or whenever you want a crowd-pleasing dessert that looks as glorious as it tastes.
My family cheers when they see this in the freezer. I made my first one for my best friend’s summer picnic and it disappeared in minutes. Now it is a birthday tradition.
Ingredients
- Oreo cookies: A chocolatey crunchy base that holds firm even after freezing Select cookies that are not stale for the best texture
- Unsalted butter: Helps the cookie crumbs set into a crust Use good quality butter for richer flavor
- Chocolate ice cream: Forms the first thick creamy layer Choose ice cream from a premium brand for maximum richness
- Hot fudge sauce: Adds an irresistible gooey chocolate ribbon through the cake Homemade or store-bought both work well but use one with a deep cocoa flavor
- Strawberry ice cream: Gives a fruity contrast and pretty pink layer Pick a strawberry ice cream with real fruit for best taste
- Cold heavy cream: For homemade whipped cream that stays fluffy Use cream that is very cold for quickest whipping
- Confectioners sugar: Sweetens and stabilizes the whipped cream Sift before adding to avoid lumps
- Pure vanilla extract: Enhances the whipped cream flavor and aroma Go for real extract not imitation for best results
- Sprinkles: Optional for a festive finish Make sure they are freezer-safe if decorating ahead
Step-by-Step Instructions
- Prepare the Oreo Crust:
- Pulse Oreo cookies with their cream filling in a food processor until you have coarse crumbs Mix crumbs well with melted butter until every bit looks wet and packs together easily Set aside
- Line Your Pan:
- Take a nine or ten inch springform pan and line with two long pieces of plastic wrap making sure it hangs over all edges This will make removing the cake later much simpler
- Layer the Chocolate Ice Cream:
- Let the chocolate ice cream sit out for about ten minutes It should be soft enough to spread but not melted Scoop into the lined pan and press down into an even layer Use the back of a spoon or an offset spatula to really smooth the top Freeze for thirty minutes so it firms up
- Add Fudge and Crust Crunch:
- Gently warm half of the fudge until it is easy to spread but not hot Layer all over the top of the frozen chocolate ice cream Scatter on the Oreo crumb mixture then lightly press so it sticks Return to the freezer for another thirty minutes
- Layer the Strawberry Ice Cream and More Fudge:
- While the last layer freezes let the strawberry ice cream soften for about ten minutes Drizzle the remaining fudge over the frozen Oreo layer then carefully spread all the strawberry ice cream over the top Smooth to the edges so every slice looks neat
- Final Chill:
- Cover the whole pan tightly with more plastic wrap and freeze for at least twelve hours or up to two days This step ensures the cake slices easily and holds its shape
- Chill the Serving Plate:
- Pop your serving plate or cake stand into the freezer for thirty minutes This helps keep the cake firm as you decorate and serve
- Whip and Decorate:
- Whip cold heavy cream confectioners sugar and vanilla in a chilled bowl on medium high for about four minutes until you get big fluffy peaks Unlatch the springform rim and use the plastic wrap to carefully lift out the cake Peel the wrap away Set on your chilled plate and quickly frost the top and sides with whipped cream Decorate with sprinkles if using and serve right away or freeze for a bit longer to set
 Save
Save
Storage Tips
Keep any leftover cake well wrapped with plastic or foil in the coldest part of your freezer A tightly sealed container prevents freezer burn The whipped cream stays fluffy for up to a week If you want to store it longer frost just before serving
Ingredient Substitutions
Swap Oreo cookies for chocolate wafer cookies chocolate graham crackers or gluten free sandwich cookies Use vanilla or mint ice cream in place of chocolate or strawberry Try peanut butter cups or caramel sauce instead of fudge There is no wrong answer
Serving Suggestions
Dress each slice with extra fudge chocolate curls or macerated berries For birthdays add candles and bright sprinkles Serve on chilled plates for an authentic ice cream parlor experience
Cultural and Historical Fun
Ice cream cakes became popular in America in the mid twentieth century when home freezers and ice cream shops boomed The classic look with neat layers still feels nostalgic At our house we call it celebration cake because it suits any joyous gathering
 Save
Save
Recipe FAQs
- → How do I soften ice cream for layering?
Let the ice cream sit at room temperature for about 10 minutes until spreadable but not melted. This makes spreading easier and helps maintain layer integrity.
- → Can I use different cookie crusts?
Yes, chocolate wafer cookies or gluten-free sandwich cookies work well as alternatives, providing a similar crunch and flavor balance.
- → What is the best way to freeze the dessert?
Freeze the assembled dessert for at least 12 hours or overnight to ensure it becomes firm enough to slice cleanly without melting.
- → How can I make the whipped cream topping last longer?
Incorporate 1 tablespoon of instant vanilla pudding mix when whipping the cream to help stabilize it and hold its shape longer.
- → Is it possible to prepare the dessert ahead of time?
Absolutely. Assemble up to 2 days in advance, then freeze. After decorating, freezing uncovered for 15 minutes before covering helps set the topping.
- → Can I customize the ice cream flavors?
Feel free to swap chocolate and strawberry with vanilla, cookies-and-cream, or mint chip for personalized flavor combinations.