
 Save
Save
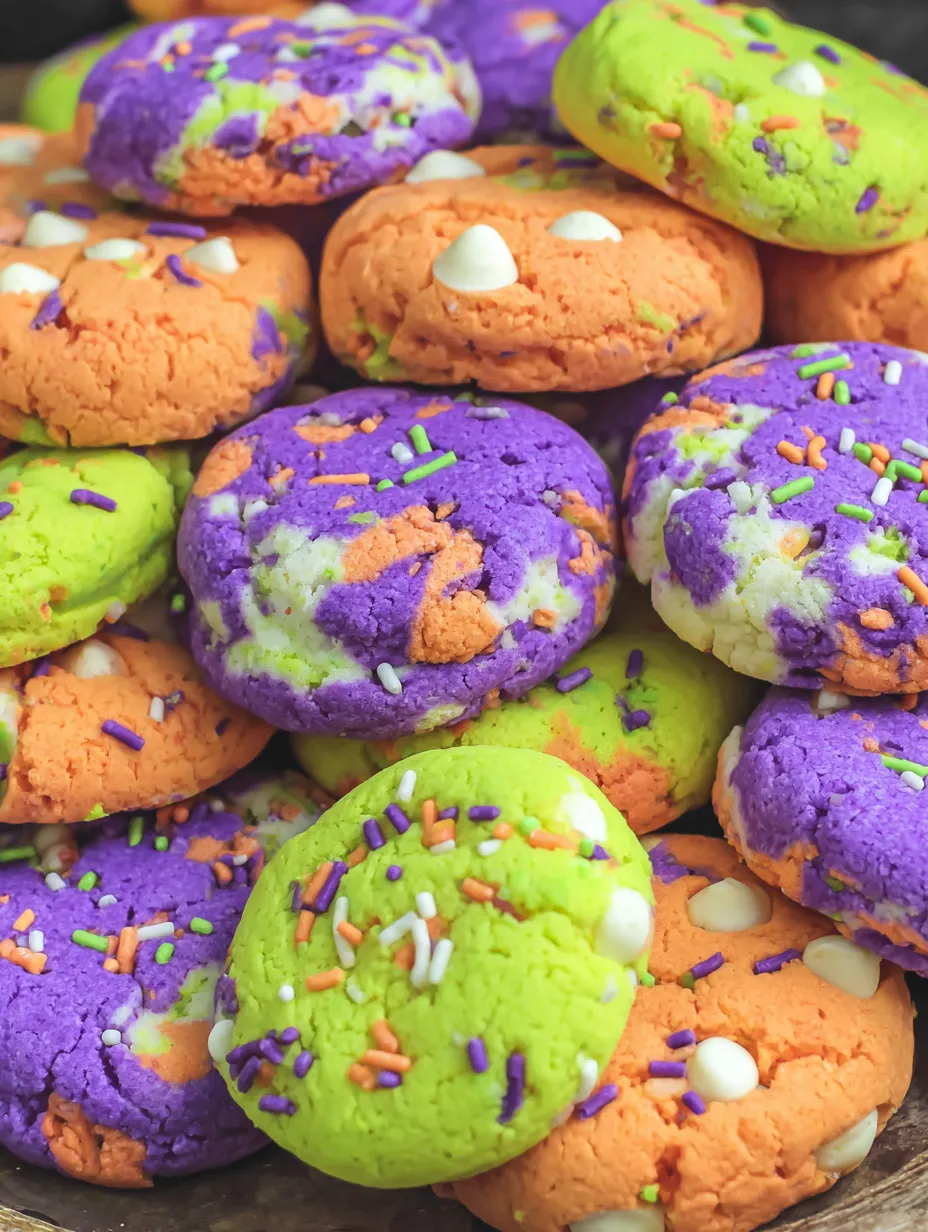
These Hocus Pocus Cookies bring magic to any Halloween treat table with their swirls of vibrant dough, creamy white chocolate chips, and a playful sprinkle topping. Their whimsical look and festive colors have made them my go to whenever the Sanderson Sisters movie marathon is on at my house. If you want cookies that get kids and grownups equally excited, this recipe always gets compliments and empty plates.
I first made these for a neighborhood Halloween potluck and every cookie disappeared before the end of the party My niece now asks for them every October and loves to help with the sprinkles
Ingredients
- Cold unsalted butter: Cut into cubes for the best soft cookie texture Choose fresh creamy butter for richer taste
- Granulated white sugar: Brings the main sweetness Using fine cane sugar will give the dough extra smoothness
- Large eggs: Room temperature eggs blend better into the batter and help cookies rise evenly
- Vanilla extract: Adds warmth and depth Real vanilla makes a difference so look for pure extract
- Cake flour: Makes the cookies light and tender Always sift for the best fluffiness
- All purpose flour: Adds stability Look for unbleached flour for a clean finish
- Cornstarch: Gives cookies a delicate crumb Choose fresh cornstarch for best texture
- Baking soda: All important for lift and chew Double check it is active for best results
- Salt: Enhances flavor of everything A flaky sea salt works nicely in cookies
- Gel food coloring: Neon green neon purple neon orange for bold Halloween vibes Gel types create vibrant colors without thinning your dough
- White chocolate chips: Creamy bits of sweetness Look for real cocoa butter chips for maximum melt factor
- Halloween sprinkles: Brings the magic Use a mix of purple black and green for the Hocus Pocus look Go for candy coated types or candy eyes for more fun
Step-by-Step Instructions
- Prepare the Dry Mix:
- Add cake flour all purpose flour cornstarch baking soda and salt to a large bowl Whisk until well blended to make sure your cookies rise evenly and bake fluffy
- Prepare Mix Ins:
- Place white chocolate chips in a medium bowl and your chosen Halloween sprinkles in a separate small bowl Set aside within easy reach to roll dough later
- Cream Butter and Sugar:
- Beat cubed cold butter and sugar with a stand mixer using high speed until the mixture turns light and fluffy This step takes around 2 to 3 minutes and creates a smooth base for your cookies
- Add Eggs:
- Crack in one egg at a time Let each one fully blend in before adding the next This keeps the batter from splitting and gives a better texture
- Add Vanilla:
- Pour in the vanilla extract and continue to mix for another minute This boosts the cookie flavor
- Combine Wet and Dry:
- With the mixer on medium speed slowly add the flour mixture a little at a time Mix only until you can no longer see streaks of flour This makes sure your cookies stay soft
- Chill the Dough:
- Cover the dough and chill in the refrigerator for 30 minutes This rest time is what helps keep the cookies extra thick and chewy
- Preheat and Prep Pans:
- Preheat your oven to 420 degrees Fahrenheit Line two cookie sheets with parchment or silicone mats to prevent sticking and even browning
- Divide and Color the Dough:
- Split the chilled dough into three equal portions each in its own bowl Add a few drops of one neon gel food coloring to each dough portion Use separate spoons or clean hands to work in the colors until bright and even
- Shape Cookies:
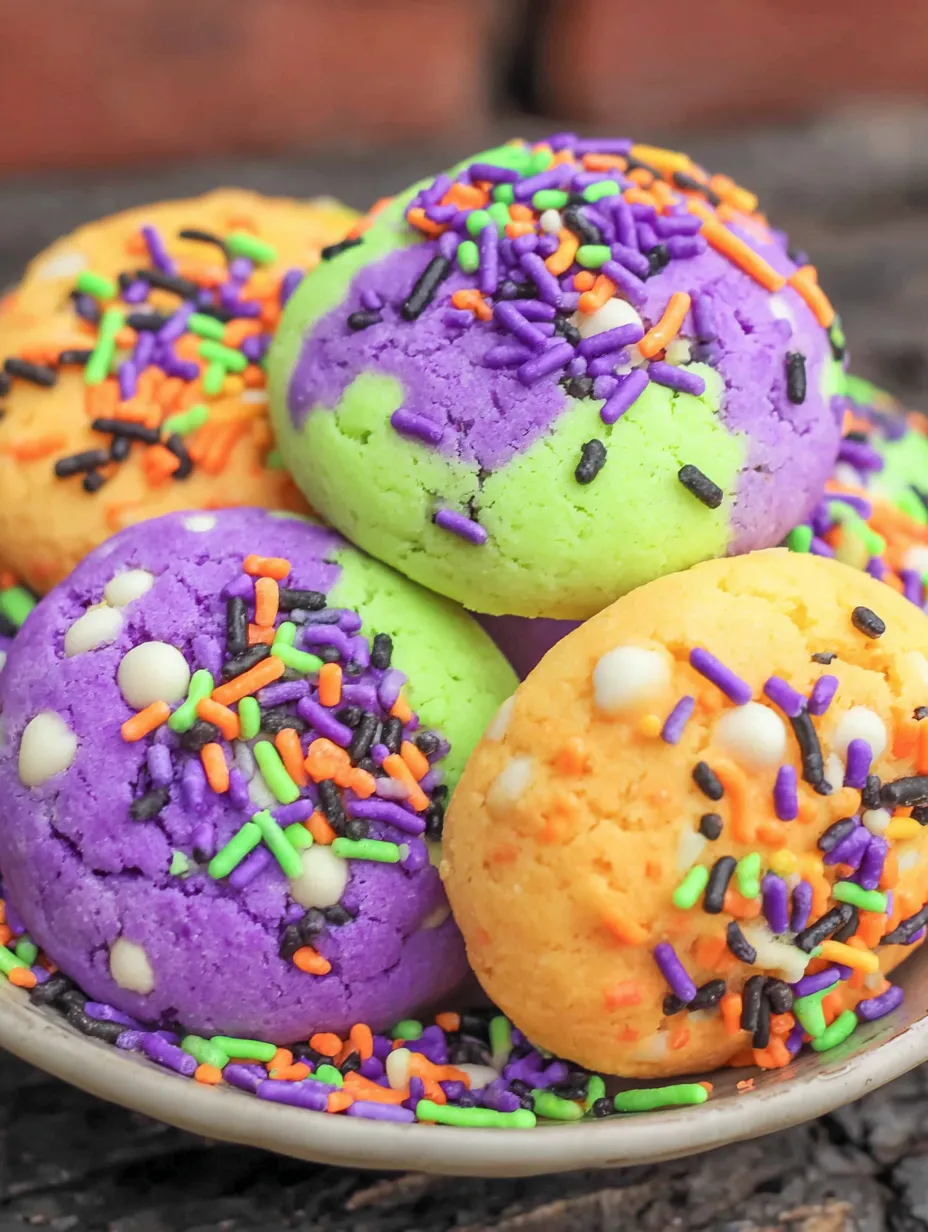
- Pinch out a tablespoon of each colored dough and roll each into a ball Press the three balls gently together and roll into one big dough ball so you get thick color streaks throughout
- Dress up with Chips and Sprinkles:
- Roll each tricolor dough ball first in white chocolate chips making sure lots stick to the surface Then roll the edges in Halloween sprinkles for extra magic
- Shape and Arrange on Pan:
- Press each dough ball gently into a thick disk Place on the prepared baking sheet giving two inches between cookies so they can rise and spread properly
- Bake:
- Bake cookies one tray at a time for 12 to 14 minutes Watch closely for golden edges and soft pillowy centers This keeps them from drying out so they stay moist
- Cool:
- Let cookies cool slightly on the pan so they firm up before transferring to a rack to cool completely This little pause keeps their shape and chewiness
 Save
Save
Every October I look forward to picking out new sprinkle combinations for these cookies Last year I found tiny candy eyes and the kids thought the batch was extra spooky My favorite part is watching everyone choose which color swirl they get in their cookie
Storage Tips
Keep cookies in an airtight container at room temperature They will stay fresh for up to five days but in my house they are usually gone within two
For longer storage freeze cookies after baking Layer between parchment in a container and thaw at room temperature when ready to eat
If you want to prep the dough ahead you can also freeze the shaped dough balls then bake straight from the freezer adding a minute or two to the bake time
Ingredient Substitutions
Swap in dark or semisweet chocolate chips if white is not your favorite The colors will still pop
Use gluten free all purpose flour for a gluten free version Make sure to add a touch more cornstarch for softness
Try your favorite holiday colored sprinkles any sprinkle combo works as long as it looks fun
If you want to avoid artificial dyes look for natural food coloring powders they give a softer pastel effect
Serving Suggestions
Serve cookies on a black tray or spider web plate for a true Hocus Pocus theme
Pair with themed milkshakes hot cocoa or green punch for a movie night treat
Wrap in cellophane with a ribbon for easy party favors or Halloween class gifts
Cultural Context
Hocus Pocus Cookies are inspired by the cult favorite Halloween film Hocus Pocus and its beloved sequel Their bold colors and playful sprinkles echo the whimsical magic of the Sanderson Sisters This recipe is now a Halloween tradition for many families who grew up with the movie just as I did building memories that last longer than the treats themselves
 Save
Save
Recipe FAQs
- → What gives the cookies their bright colors?
The vibrant hues come from neon gel food coloring mixed into separate dough portions, creating purple, green, and orange sections.
- → Why use both cake flour and all-purpose flour?
Combining cake and all-purpose flours ensures the cookies are light and fluffy while maintaining enough structure for chewy texture.
- → Can I substitute white chocolate chips with other types?
Yes, dark or semi-sweet chocolate chips can be used for a different flavor profile without compromising texture.
- → How should these cookies be stored to maintain freshness?
Store in an airtight container at room temperature for a few days or freeze for longer preservation while keeping the texture intact.
- → What makes these cookies soft and chewy?
Ingredients like cornstarch and careful baking time contribute to a soft, chewy consistency with just enough crisp edges.
- → Can I add nuts to the cookie dough?
Adding chopped nuts such as pecans or macadamia nuts is a great way to introduce crunch and extra flavor.