
 Save
Save
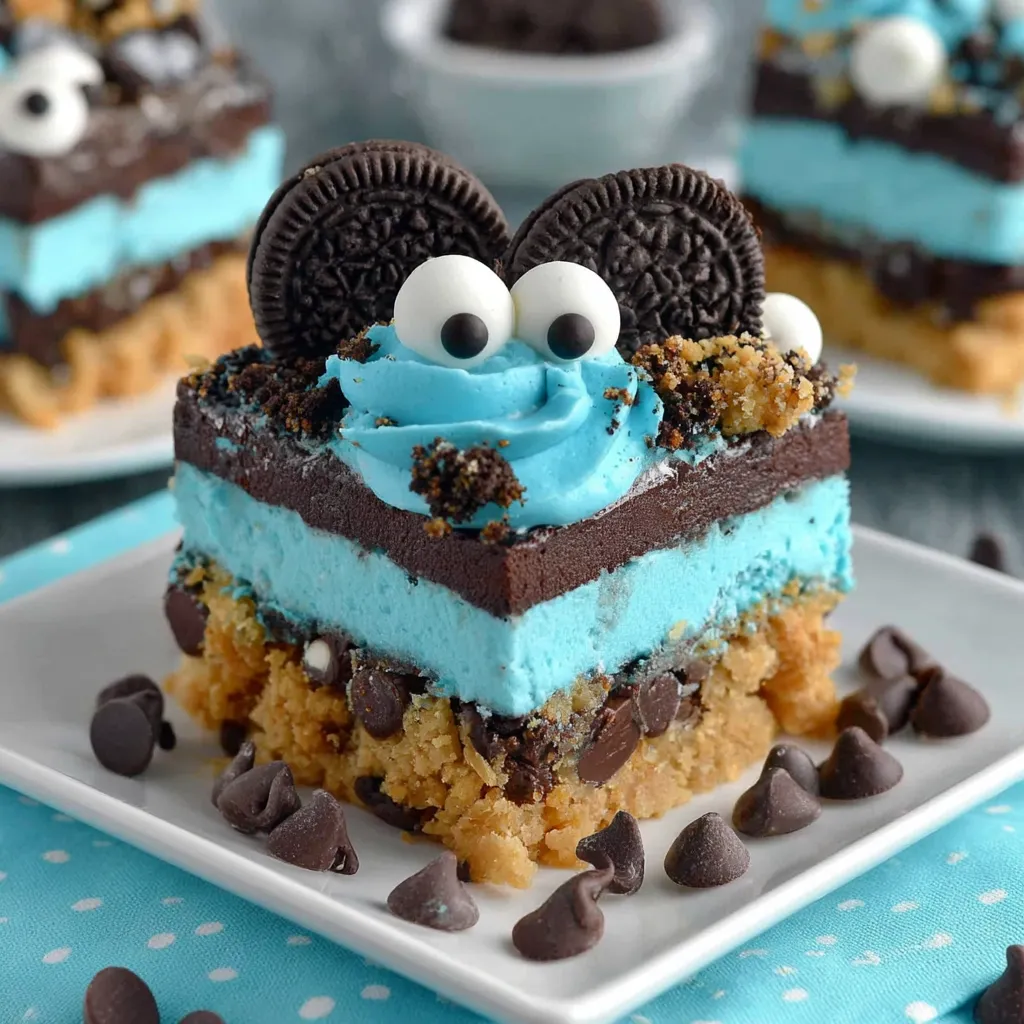
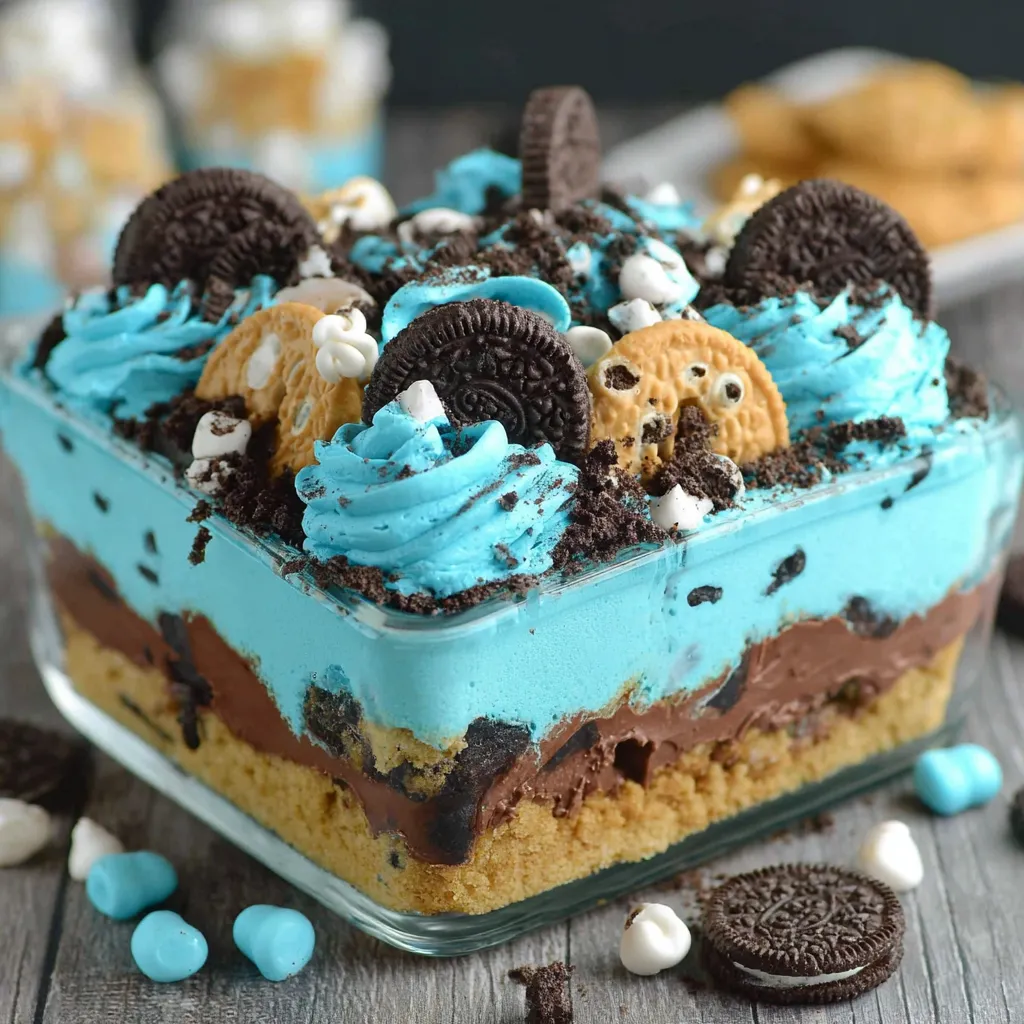
This Cookie Monster Dessert is a fun and festive layered treat perfect for parties or family gatherings. It features a chocolate chip cookie crust topped with a vibrant blue cream cheese layer, creamy chocolate pudding studded with Oreos, and a fluffy whipped topping that’s decorated to look just like Cookie Monster himself. This dessert brings both smiles and indulgence in every bite.
Why You Will Love This Recipe
- Uses everyday ingredients you can find at most grocery stores
- Bright and playful appearance that kids and adults adore
- Takes under an hour from start to finish, with some chill time included
I first made this for my nephew’s birthday, and it quickly became the highlight of the party. The colorful layers and playful decoration make it as delightful to look at as it is to eat.
Ingredients
- Chocolate chip cookie dough for the crust: which bakes into a chewy and flavorful base, opt for a tube of quality refrigerated dough for convenience
- Cream cheese: softened for a smooth and tangy cheesecake layer that balances the sweetness
- Powdered sugar: adds just the right amount of sweetness to the cream cheese filling
- Cool Whip: thawed to give the cheesecake layer and topping a light and fluffy texture
- Blue gel food coloring: to achieve the iconic Cookie Monster blue without altering the flavor
- Instant chocolate fudge pudding mix: combined with milk for a creamy and luscious pudding layer
- Whole Oreos: chopped to add crunch and classic cookie flavor to the pudding
- Mini Oreos and Chips Ahoy cookies: chopped for decorating, adding charm and extra texture
- Candy eyes: for the whimsical Cookie Monster look
Step-by-Step Instructions
- Sauté the crust:
- Preheat your oven to 350 degrees Fahrenheit and spray a 9 by 13 inch glass baking dish with nonstick spray. Press the chocolate chip cookie dough evenly into the bottom of the dish. Bake for 14 to 15 minutes until golden brown, then let it cool completely. Cooling completely prevents the next layer from melting.
- Prepare the cheesecake layer:
- In a mixing bowl beat the softened cream cheese with powdered sugar until light and creamy. Gently fold in one container of thawed Cool Whip. Add blue gel food coloring drop by drop with a toothpick until you get the perfect Cookie Monster blue. Spread this mixture evenly over the cooled cookie crust with an offset spatula and refrigerate to chill.
- Make the pudding layer:
- Whisk together the instant chocolate fudge pudding mixes with three cups of milk until fully combined. Allow it to sit and thicken as directed on the pudding package. Once thickened, gently fold in the chopped Oreos for texture and flavor. Spread evenly over the blue cheesecake layer and return to the refrigerator to set.
- Top with whipped topping:
- Reserve one cup of plain Cool Whip. Tint the rest with blue gel food coloring until it matches your desired shade. Spread the blue whipped topping over the pudding layer. Drop dollops of the reserved plain Cool Whip on top and gently swirl it with the blue for a fun marbled look.
- Decorate like Cookie Monster:
- Sprinkle chopped mini Oreos and Chips Ahoy cookies across the top. Add candy eyes to create the Cookie Monster face or place them randomly for a whimsical effect. Chill the entire dessert fully before serving. Use a sharp knife wiped clean between slices for neat servings.
 Save
Save
I love how the cream cheese layer adds a tangy richness that really makes the cookie and chocolate pudding layers pop. One year my kids begged me to make this for every birthday because they loved decorating it with their friends most of all.
Storage Tips
Store any leftovers covered in the refrigerator. It keeps well for up to three days but is best enjoyed within 24 hours to maintain the whipped topping’s light texture. You can also freeze individual slices wrapped tightly to enjoy later, just thaw them in the fridge before serving.
Ingredient Substitutions
For a dairy-free version try plant-based cream cheese and non-dairy whipped topping alternatives. If you cannot find chocolate chip cookie dough, a graham cracker crust can work but will change the texture. Use your favorite chocolate pudding mix, just be sure to follow the milk ratio for thick pudding.
Serving Suggestions
Serve chilled with a glass of cold milk or a scoop of vanilla ice cream alongside. This dessert shines at casual gatherings and birthday parties. Kids especially love helping assemble and decorate the Cookie Monster face for that extra-special touch.
Pro Tips
- To get the smoothest layers I learned the hard way not to rush cooling the cookie crust or the cream cheese layer will melt.
- Use an offset spatula to spread each layer evenly for the most professional looking dessert.
- Be patient adding the blue gel coloring, a little goes a long way, and you can always add more but cannot remove excess color once mixed.
Recipe FAQs
- → How do I prevent the cream cheese layer from melting?
Make sure the cookie crust is completely cooled before spreading the cream cheese mixture to maintain distinct layers.
- → Can I prepare this dessert in advance?
Yes, chilling it for several hours or overnight helps the layers set firmly and enhances the flavor combination.
- → What is the best way to get even layers?
Use an offset spatula to spread each layer smoothly and evenly, ensuring a clean look and pleasant texture.
- → How should I slice the dessert for serving?
Use a sharp knife and wipe it clean between cuts to maintain neat portions and prevent mixing layers.
- → Is there a no-bake alternative for the crust?
Yes, you can substitute the baked cookie dough crust with a ready-made cookie pie crust for an easier no-bake version.