
 Save
Save
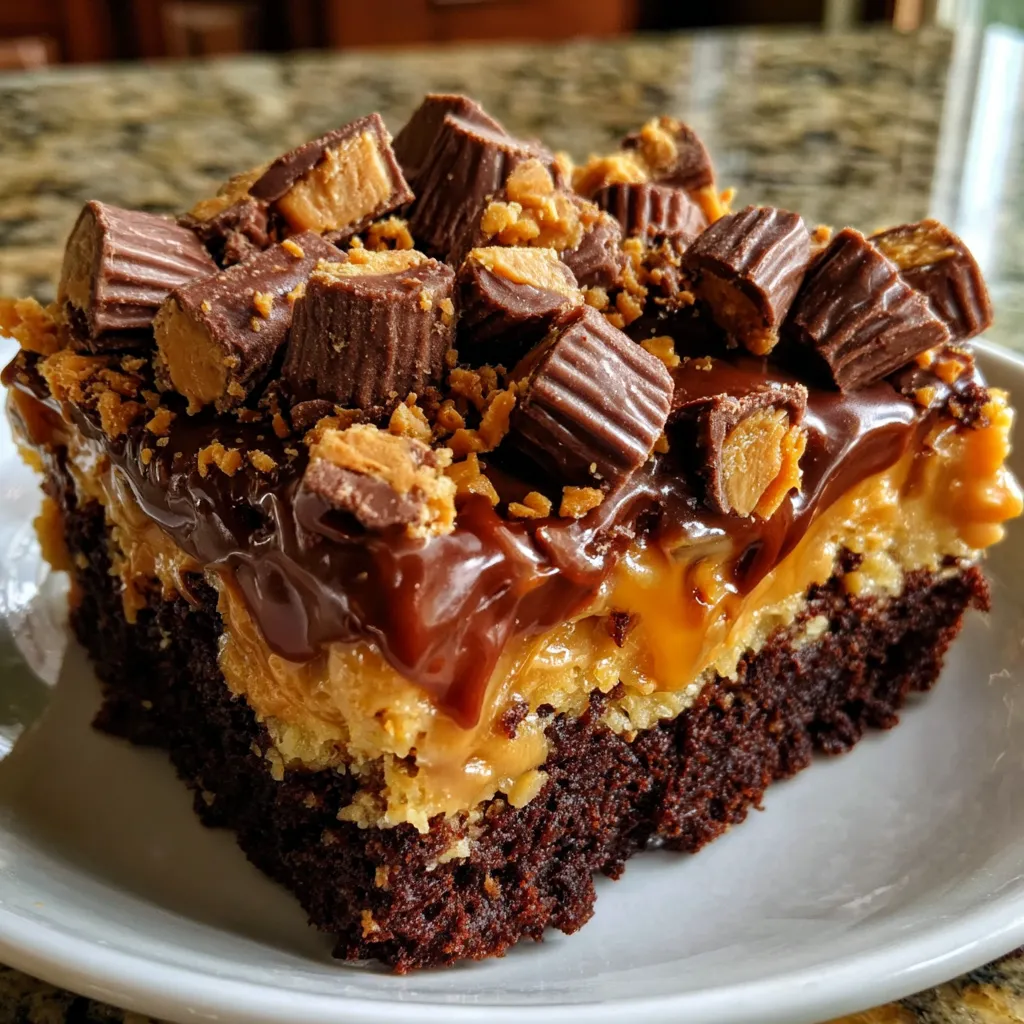
This peanut butter cup cake brings together layers of rich chocolate and creamy peanut butter in a dessert that feels indulgent but is incredibly simple to make. It’s perfect for when you want a crowd-pleaser that’s quick to prepare yet impressive in flavor and texture. Every bite melts warmly with pudding, cake, and peanut butter candies creating a comforting treat that has become a trusted favorite in my family circle.
Ingredients
- Chocolate cake mix: with a rich flavor base for a moist and tender crumb choose a quality brand without added lumps or clumps
- Instant chocolate pudding mix: which makes the creamy middle layer thick and decadent refrigerated options work best for a smoother finish
- Cold whole milk: provides moisture and richness, for dairy-free, substitute with almond or oat milk
- Creamy peanut butter: that drizzles easily and blends into the layers avoid natural ones that separate too much for easier spreading
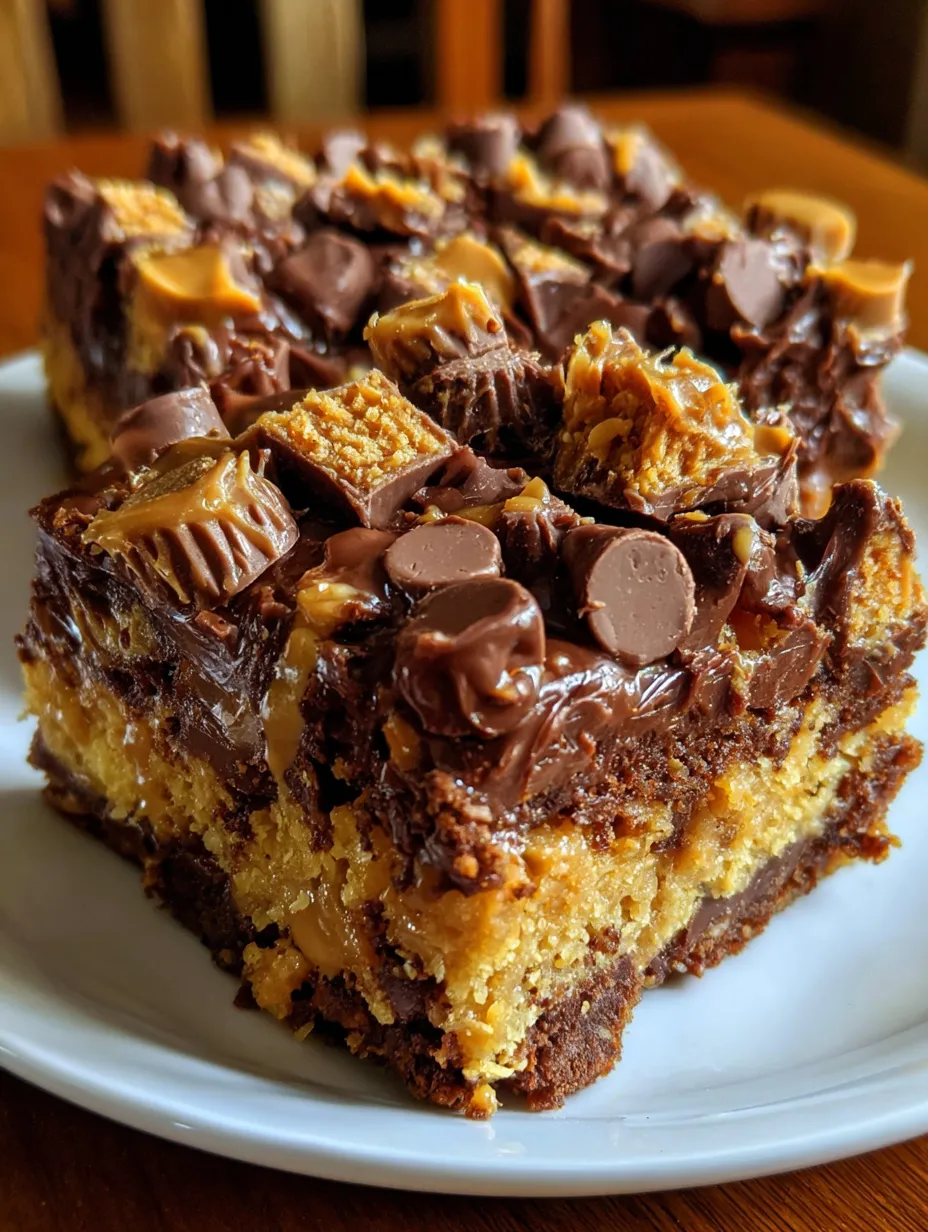
- Mini peanut butter cups: chopped to add bursts of peanut butter and chocolate throughout try to pick fresh cups without melting
- Semi-sweet chocolate chips: optional ingredient for extra chocolate hits on top choose good quality chips for melt and texture
Step-by-Step Instructions
- Preheat the oven:
- Preheat oven to 350 degrees Fahrenheit. Generously grease a 9 by 13 inch glass or ceramic baking dish with nonstick spray or softened butter to ensure nothing sticks during baking.
- Mix the pudding:
- In a large bowl, whisk together the instant chocolate pudding mix and the 2 cups of cold milk briskly for two minutes until the mixture is thick and glossy, building a creamy texture.
- Prepare the pudding layer:
- Pour the pudding evenly into the prepared dish. Use a spatula to spread the pudding carefully all the way to the edges so the layer rises uniformly during baking.
- Layer the cake mix:
- Sprinkle the chocolate cake mix evenly over the pudding layer. Do not stir it in now. Leaving it on top will create the cake layer as it bakes.
- Add the peanut butter:
- Warm the peanut butter in the microwave for about 20 to 30 seconds until it is loose enough to drizzle. Drizzle the peanut butter in ribbons over the cake mix layer evenly.
- Add the mix-ins:
- Scatter the chopped mini peanut butter cups across the top, pressing some into the corners. Sprinkle on chocolate chips if you are using them for added chocolate bursts.
- Bake the cake:
- Place in the oven and bake for 35 to 40 minutes. Look for a dry, lightly cracked top and gently springy center when pressed. Edges may bubble slightly as the pudding layer cooks up underneath.
- Rest before serving:
- Let the cake rest for 10 minutes out of the oven. Serve warm to enjoy the melty texture. Optionally top with whipped cream, vanilla ice cream, or extra peanut butter cups for garnish.
 Save
Save
My favorite ingredient here has to be the mini peanut butter cups. They add a nostalgic candy bar vibe and give just the right pockets of gooey, salty, peanut butter goodness. I have fond memories sharing this cake with family on chilly afternoons, always savoring those little cups that peek out from the cake layers.
Storage Tips
Store any leftover cake covered tightly with plastic wrap or in an airtight container in the refrigerator for up to four days. Reheat individual slices in the microwave for about 20 seconds to revive the warm melty texture. You can freeze the cake for longer storage by wrapping it in foil and placing it in a freezer-safe container, ensuring to thaw completely before reheating.
Ingredient Substitutions
For those avoiding dairy, swap whole milk for almond milk or oat milk and use dairy-free pudding mixes along with vegan chocolate chips to keep the flavor intact. If peanut butter is a concern, almond butter can be substituted though it will slightly change the flavor profile. In place of the mini peanut butter cups, chopped peanut butter candies or plain milk chocolate chips can add different textures.
Serving Suggestions
This cake is perfect on its own while still warm but pairs wonderfully with a scoop of vanilla ice cream or a dollop of freshly whipped cream for extra indulgence. Garnishing with a sprinkling of flaky sea salt enhances the chocolate and peanut butter flavors even more. Serve it with coffee or cold milk for a nostalgic dessert experience.
Cultural and Historical Context
 Save
Save
Peanut butter and chocolate have a long history as a favored flavor pairing in American sweets, inspired partly by the success of peanut butter cups invented by candy companies in the early 20th century. Incorporating these candies into cakes like this one channels that classic confectionery nostalgia into a home-baked dessert that’s both modern and timeless.
Recipe FAQs
- → How can I prevent the dessert from sticking to the baking dish?
Generously grease the baking dish with nonstick spray or softened butter to ensure easy removal and clean edges.
- → What’s the best way to get smooth pudding layers?
Whisk the pudding mix and cold milk briskly for about 2 minutes until thick and glossy, then spread evenly to every edge of the pan.
- → Can I substitute the peanut butter for a different nut butter?
Yes, creamy almond or cashew butter can work well to maintain the layered texture and nutty flavor.
- → How do I know when the dessert is fully baked?
Look for a lightly cracked top and a center that springs gently when touched. The edges may bubble slightly.
- → What optional toppings go well with this dessert?
Whipped cream, vanilla ice cream, or extra chopped peanut butter cups add extra richness and texture.
- → Can this dessert be made dairy-free?
Yes, replacing milk with dairy-free alternatives and using vegan-friendly chocolate chips adapts it for dairy-free diets.